Security Example in Spring Boot
Implementation of Spring Security in the Spring Boot application is the key point to learn for spring boot developers. Because Authentication and Authorization are the backbones of the whole application.
Getting started with the Spring Security Series, this is the first part, in this article we are going to focus on the authentication part with minimal registration. The implementation of registration flow with email verification, customizing password encoding, and setting up password strengths and rules will be explored in another separate article for each.
This article will be the base of the spring security series, the other security features will be explained on the basis of this implementation, so be focused and let's understand. The code contains proper naming & brief comments that makes it very comprehensive. If you feel any difficulty or find any issue, please drop a comment below this post
The main goal of this article is to implement optional login means login either with an email or mobile number and password.
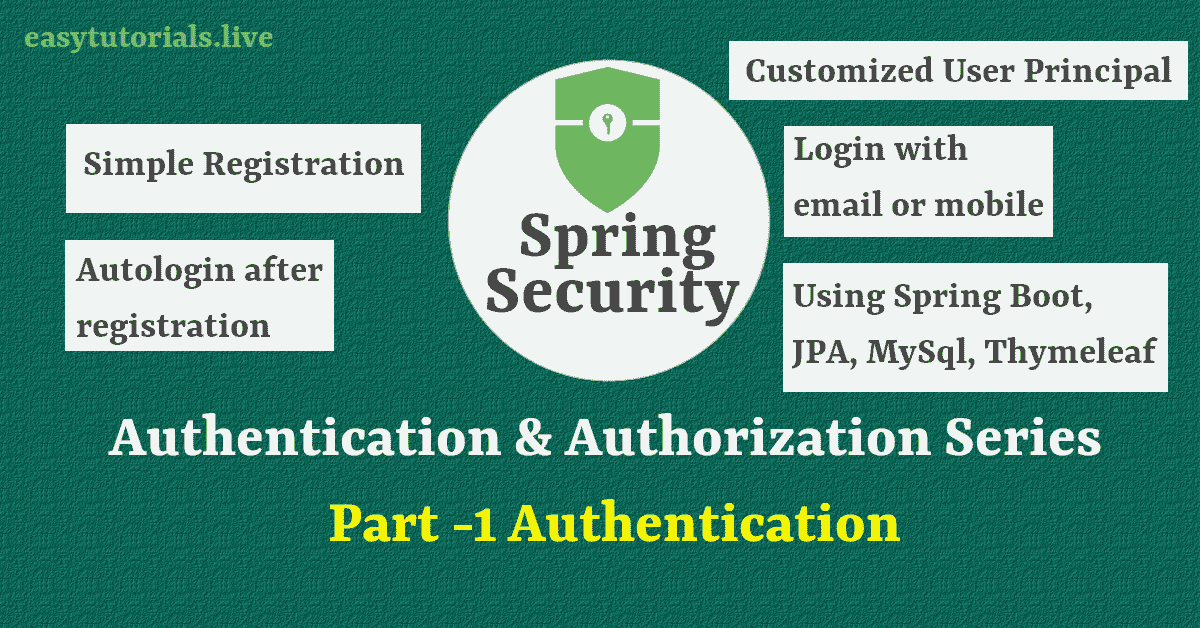
Table of Contents
- 1. Initialize the project with dependencies listed below:
- 2. Now create a User model
- 3. Creating a repository for performing database operations for the entity User
- 4. Implementing the UserDetails for authentication
- 5. Implement the UserDetailsService for handling UserDetails
- 6. Define the security configurations by extending WebSecurityConfigurerAdapter
- 7. Create user service to handle user operations
- 8. Create a controller to control authentication
- 9. Application properties
- 10. Create a registration page
- 11. Create a login page
- 12. Create profile page (the first page after login)
- 13. Screens
1. Initialize the project with dependencies listed below:
- Spring Web
- Spring Security
- Thymeleaf
- Thymeleaf Extra Security5
- Spring Data JPA
- Spring Boot Dev Tools
- Lombok
- MySql
You can use any built tool. To know what to choose go to Maven or Gradle
2. Now create a User model
Create an Entity class User.java in the models' package. You may aware of the annotations used in creating entity class. If not then we have explained below the code.
@Getter
@Setter
@NoArgsConstructor
@Entity
public class User {

    @Id
    @GeneratedValue(strategy = GenerationType.IDENTITY)
    Long id;
    @Column(unique = true)
    String uniqueId = UUID.randomUUID().toString();
    String name;
    @Column(unique = true)
    String email;
    @Column(unique = true)
    String mobile;
    String password;
    String role;
    String profilePic;
    LocalDateTime createdOn;
    LocalDateTime updatedOn;

    @PrePersist
    public void creationSpot(){
        this.createdOn=LocalDateTime.now();
        this.updatedOn=LocalDateTime.now();
    }
    @PreUpdate
    public void updationSpot(){
        this.updatedOn=LocalDateTime.now();
    }

}
Annotations used in the above code are self-explanatory but keeping in mind for beginners we would like to describe as follows:
- @Getter, @Setter, and @NoArgsConstructor are the annotations of Lombok dev tools used to generate getters, setters, and a constructor with no argument respectively.
- Other annotations are defined well in this article Annotations related to Data Persistency
3. Creating a repository for performing database operations for the entity User
For working with JPA we need to create an interface and extend the JpaRepository by telling the entity name and Id type as we have defined in the entity. To do this, create UserRepository.java and define two methods to fetch user details from the database by email id and mobile number, see below code.
public interface UserRepository extends JpaRepository<User,Long> {
    Optional<User> findByEmail(String email);
    Optional<User> findByMobile(String mobile);
//..other methods
}
4. Implementing the UserDetails for authentication
For authentication, we need to implement the UserDetails interface of the spring security core. Its data will be written in login principal after successful login. We can implement it in the User entity also, but to keep things organized well let's make it separately.
@Getter
@Setter
public class CustomUserPrincipal implements UserDetails, Serializable {

    private String  uniqueId;
    private String name;
    private String email;
    private String mobile;
    private String profilePic;
    @JsonIgnore
    private String username;
    @JsonIgnore
    private String password;
    @JsonIgnore
    private Collection<? extends GrantedAuthority> authorities;

   public CustomUserPrincipal(String uniqueId, String loggedInName, String profilePic, String username, String email, String mobile, String password,
                                                          Collection<? extends GrantedAuthority> authorities) {
        this.uniqueId = uniqueId;
        this.name =loggedInName;
        this.email=email;
        this.mobile=mobile;
        this.profilePic=profilePic;
        this.username = username;
        this.password = password;
        this.authorities = authorities;
    }

    public static CustomUserPrincipal createWithEmail(User user) {
        List<GrantedAuthority> authorities = new ArrayList<>();
        authorities.add(new SimpleGrantedAuthority(user.getRole().toString()));
        return new CustomUserPrincipal(
                user.getUniqueId(),
                user.getName(),
                user.getProfilePic(),
                user.getEmail(),
                user.getEmail(),
                user.getMobile(),
                user.getPassword(),
                authorities
        );
    }
    public static CustomUserPrincipal createWithMobile(User user) {
        List<GrantedAuthority> authorities = new ArrayList<>();
        authorities.add(new SimpleGrantedAuthority(user.getRole().toString()));
        return new CustomUserPrincipal(
                user.getUniqueId(),
                user.getName(),
                user.getProfilePic(),
                user.getMobile(),
                user.getEmail(),
                user.getMobile(),
                user.getPassword(),
                authorities
          );
    }
    @Override
    public String getUsername() {  return username; }

    @Override
    public String getPassword() { return password; }

    @Override
    public Collection<? extends GrantedAuthority> getAuthorities() { return authorities; }

    @Override
    public boolean isAccountNonExpired() { return true; }

    @Override
    public boolean isAccountNonLocked() { return true; }

    @Override
    public boolean isCredentialsNonExpired() {  return true; }

    @Override
    public boolean isEnabled() {  return true; }
}
5. Implement the UserDetailsService for handling UserDetails
This is required to implement because the spring security calls method loadUserByUsername(username) that are specified in the UserDetailsService interface.
And also we define a method that authenticates users first time just after registration by using the UsernameAuthenticationToken class.
@Service
@Log
public class SecurityService implements UserDetailsService {

    @Autowired
    private UserRepository userRepository;
    @Autowired
    private AuthenticationManager authenticationManager;

    @Override
    @Transactional
    public UserDetails loadUserByUsername(String username) throws UsernameNotFoundException {
        // Let people login with either email or mobile
        CustomUserPrincipal userPrincipal = null;
        Optional<User> user = null;

        /* check user if user enters email as username*/
        user = userRepository.findByEmail(username);
        if (user.isPresent())
            userPrincipal = CustomUserPrincipal.createWithEmail(user.get());
        else {
            /* check user if user not present with email, username may be mobile no.*/
            user = userRepository.findByMobile(username);
            if (user.isPresent())
                userPrincipal = CustomUserPrincipal.createWithMobile(user.get());
        }
        /* check that user is present with email or mobile */
        if (userPrincipal == null)
            throw new UsernameNotFoundException("User not found with username: " + username);
        else
            return userPrincipal;
    }

/* Username Password Authentication method to allow user to log in just after registration*/
    public void loginFirstTime(User user,String plainPassowrd) {
        log.info("Auto login .....!");
        UserDetails userDetails = loadUserByUsername(user.getEmail());
        UsernamePasswordAuthenticationToken usernamePasswordAuthenticationToken = new UsernamePasswordAuthenticationToken(userDetails, plainPassowrd, userDetails.getAuthorities());
        authenticationManager.authenticate(usernamePasswordAuthenticationToken);
        if (usernamePasswordAuthenticationToken.isAuthenticated()) {
            SecurityContextHolder.getContext().setAuthentication(usernamePasswordAuthenticationToken);
            log.info(String.format("Auto login %s successfully!", user.getEmail()));
        } else System.err.println("auto login failed");
    }
}
6. Define the security configurations by extending WebSecurityConfigurerAdapter
Here we are defining the security rules of the application
@Configuration
@EnableWebSecurity
@EnableGlobalMethodSecurity(
        securedEnabled = true,
        jsr250Enabled = true,
        prePostEnabled = true
)
public class SecurityConfig extends WebSecurityConfigurerAdapter {
    @Autowired
    private SecurityService customSecurityService;

    /* this will handle the login form, will call the loadUserByUsername method to get user details
       then match password */
    @Override
    public void configure(AuthenticationManagerBuilder authenticationManagerBuilder) throws Exception {
        authenticationManagerBuilder.userDetailsService(customSecurityService).passwordEncoder(passwordEncoder());
    }

    @Override
    public void configure(HttpSecurity httpSecurity) throws Exception {
        httpSecurity
                .authorizeRequests()
                /* permitting these pages to be opened without login */
                .antMatchers("/","/login","/register","/assets/**").permitAll()
                /* assets will contain css, js and fonts, etc */
                /* other pages having any url pattern will require login */
                .anyRequest().authenticated()
                .and()
                .formLogin()
                .loginPage("/login")
                /* always redirect to profile page after successful login  */
                .defaultSuccessUrl("/profile", true)
                .and()
                .logout()
                .permitAll();
        httpSecurity.csrf().disable();
        httpSecurity.headers().frameOptions().disable();
    }

/* these beans will be created for autowiring in components/services */
    @Override
    @Bean
    public AuthenticationManager authenticationManagerBean() throws Exception {
        return super.authenticationManagerBean();
    }

    @Bean
    public BCryptPasswordEncoder passwordEncoder() {
        return new BCryptPasswordEncoder();
    }
}
7. Create user service to handle user operations
Inside the user service, we will create methods for registration, get security principal, and user details of the logged-in user, and update the method to change security principal details without logout.
@Service
public class UserService {
    @Autowired
    private SecurityService securityService;
    @Autowired
    private BCryptPasswordEncoder passwordEncoder;

    @Autowired
    private UserRepository userRepository;

    public ModelAndView registerUser(User user) {
        ModelAndView mv = new ModelAndView("profile");
        Optional<User> checkUser = userRepository.findByEmail(user.getEmail());
        if(!checkUser.isPresent()){
            checkUser = userRepository.findByMobile(user.getMobile());
            if(!checkUser.isPresent()) {
                String plainPassowrd = user.getPassword();
                user.setPassword(passwordEncoder.encode(plainPassowrd));
                //setting the default role as string
                user.setRole("ROLE_USER");
                /* role based authorization will be demonstrated in part 2 of this series
                 keep visiting easytutorials.live */
                user = userRepository.save(user);

                /* auto login first time */
                securityService.loginFirstTime(user,plainPassowrd);
            }else{
                mv.setViewName("register");
                mv.addObject("error","A user is already present with this mobile number");
            }
        }else{
            mv.setViewName("register");
            mv.addObject("error","User already registered with this email");
        }
        return mv;
    }


/* This method will use to change the authentication principal details without logout */
    public void updateAuthenticationDetails(User updatedUser) {
        Authentication auth = SecurityContextHolder.getContext().getAuthentication();
        CustomUserPrincipal user = (CustomUserPrincipal) auth.getPrincipal();
        user.setName(updatedUser.getName());
        user.setProfilePic(updatedUser.getProfilePic());
        user.setEmail(updatedUser.getEmail());
        user.setMobile(updatedUser.getMobile());
        Authentication newAuth = new UsernamePasswordAuthenticationToken(user, auth.getCredentials(), auth.getAuthorities());
        SecurityContextHolder.getContext().setAuthentication(newAuth);
    }

    /* if you need something with logged in user principal details */
    public CustomUserPrincipal getLoggedInUserPrincipal(){
        Authentication auth = SecurityContextHolder.getContext().getAuthentication();
        CustomUserPrincipal user = (CustomUserPrincipal) auth.getPrincipal();
        return user;
    }

    /* if you need all details of logged in user */
    public User getLoggedInUser(){
        return userRepository.findByEmail(getLoggedInUserPrincipal().getEmail()).get();
    }
}
8. Create a controller to control authentication
@Controller
public class AuthController {

    @Autowired
    private UserService userService;

    @GetMapping(value = {"/", "/login"})
    public String login(Model model, String error, String logout, Principal principal) {
        if (principal != null)
            return "redirect:/profile";
        if (error != null)
            model.addAttribute("error", error);

        if (logout != null)
            model.addAttribute("message", "You have been logged out successfully.");

        return "login";
    }

    @GetMapping("/register")
    public String register(Model model, Principal principal) {
        if (principal != null) {
            return "redirect:/profile";
        }
        return "register";
    }

    @PostMapping("/register")
    public ModelAndView register(User user) {
        ModelAndView mv = userService.registerUser(user);
        return mv;
    }

    /* to check the authentication principal details */
    @GetMapping("/principal")
    @ResponseBody
    public Principal principal(Principal principal) {
        return principal;
    }

    /* you can only open this page if user is authenticated, why? see SecurityConfig.java */
    @GetMapping("/profile")
    public String profile(Model model) {
        /* simply open the profile page
         *  and display the name, email, mobile number and profile picture
         *  through authentication principal, how? see profile.html */
        return "/profile";
    }
}
9. Application properties
spring.datasource.url=jdbc:mysql://localhost:3306/springsecurity?createDatabaseIfNotExist=true
spring.datasource.username=root
spring.datasource.password=root
spring.datasource.driver-class-name=com.mysql.cj.jdbc.Driver
spring.jpa.hibernate.ddl-auto=update
spring.jpa.show-sql=true
server.port=8888
10. Create a registration page
we are showing you here the minimum required lines
<!-- minimal design of registration form, you can design yourself or visit github link provided below -->
<form action="/register" method="post">
  <input type="text" placeholder="Your Name" name="name" required>
  <input type="email" placeholder="Your Email" name="email"   required>
  <input type="text" placeholder="Mobile number"  name="mobile"  required>
  <input type="password" placeholder="New password" name="password" required>
  <button type="submit">Register</button>
</form>
11. Create a login page
Minimal HTML code required for the login form. You can find the source code link of this project below.
<!-- minimal design of login form, you can design yourself or visit github link provided below -->
  <form action="/login" method="post">
      <input type="text" placeholder="Email or mobile"   name="username" required>
      <input type="password" placeholder="Enter password"  name="password"  required>
      <button type="submit">Sign In</button>
      <p>Do not have account? <a href="/register">REGISTER HERE</a></p>
 </form>
12. Create profile page (the first page after login)
<!--  showing you the essential part to write the authentication detail in html page using thymeleaf -->
<div class="card">
   <div class="profile-pic" th:with="pic=${#authentication.principal.profilePic}">
    <img th:src="${pic!=null?'data:image/png;base64,'+pic:'/assets/user-icon.png'}">
   </div>
   <br>
   <p class="text-center"><strong th:text="${#authentication.principal.name}"></strong></p>
   <p>Email : <span  th:text="${#authentication.principal.email}"></span></p>
   <p>Mobile:<span th:text="${#authentication.principal.mobile}"></span></p>
    </div>
</div>
13. Screens
Login Page

Profile Page

Database table data

Thanks for reading this article, I hope you understand well the above explanation.
And as always you can find the source code on GitHub